Saturday, September 24, 2011

Ribbon Share of the Week~ 3/8” Ruffled Ribbon

Hi Everyone,

Just wanted to bring you up to speed on the Ribbon Share of the Week. I will be cutting and sorting Ribbons sometime in the next few days to get out to those of you that jumped on board with the Ribbon Shares for the last two weeks. So you’ll be getting it soon.

The Ribbon Share this week is for the 3/8” Ruffled Ribbon in the 2012 In-Colors!!!

                                   Ruffled Ribbon

You will receive 2 yards of each of these colors….

Calypso Coral, Island Indigo, Lucky Limeade, Pool Party and Wisteria Wonder! These colors are to die for and so is the ribbon.

The rules are the same….it takes five people to be entered into a share. Each person gets two yards of each color for a total of 10 yards of assorted Ribbon. As soon as I have five people I will  start another group. The order will go in next Thursday, September 29th.

The cost per share is $11.71 + $3.00 shipping regular mail, if you would like Priority Mail it will be $5.00. Please email me you full name, address and phone number and the email address you use for Paypal.

Thanks for stopping in and have a wonderful weekend. I’ll be back soon with a share for you.

post signature

Friday, September 23, 2011

Stamping 411 Sketch 222~Bells and Boughs

Hi Everyone,

Can someone please tell me where these weeks are going? Holy Moly…they are just flying by. I feel like I need 36 hours in a day to do what I’d like to do.

Time for another sketch challenge from the Stamping 411 Team…I hope you’ll pop on over there to see what the other Operators are up to.

Here is the sketch:

ssc222

….and my interpretation using the Bells and Boughs Set.

 skethces 221-222 004 

I just had to use Shimmery White Card Stock for this card. It just screamed for it. I wanted to add the Silver Shimmer Paper for the edge so wanted the whole thing to be sparkly…’tis the Season for Sparkly, right?

The base of the card is cut to 5 1/4 x 10 1/2 and folded in half. The next layer is actually the next Shimmer White mat that is cut to 4 7/8 x 4 7/8. It is scored using the Simply Scored Tool from Stampin’ Up! at 1/2 inch all the way around. I added a Rhinestone gem to the cross section of each corner. I cheated here a little as I cut thin strips of the Silver Shimmer Paper and glued to the back of the scored mat. No sense in using a whole big piece of it when you can piece it right?

My next mat is of Cherry Cobbler and measures 3 3/8x 3 3/8 and the image mat, again in Shimmery White is cut to 3 3/4 x 3 3/4 and stamped in Versamark….and sprinkled with Silver Embossing Powder and heat set. Lovely on it’s own….I wanted a slight pop of color so brought out my Sherry Cobble and Old Olive Markers and colored in. My final touch was a double bow done with the fabulous Cherry Cobbler Seam Binding. Hope you like it.

Make sure to visit the Stamping 411 Blog and play along or just go on over and say hello and see what’s happening. Have a great weekend!!!

post signature

Wednesday, September 21, 2011

Greeting Card Kids~Checkered Background Technique and Free Tutorial

Hi Everyone,

Don’t forget my Ribbon Share of the Week…it’ ends this Friday. I’ve already placed a couple of shares and have started another…..so do let me know by hitting the contact me button and putting Scallop Dots Ribbon Share in the Subject Line.Don’t forget to add your full name, address and zip as well as your email so I can send you a Paypal Invoice when the share is full. Click here for full details.

Now onto my card share and Tutorial for today…..

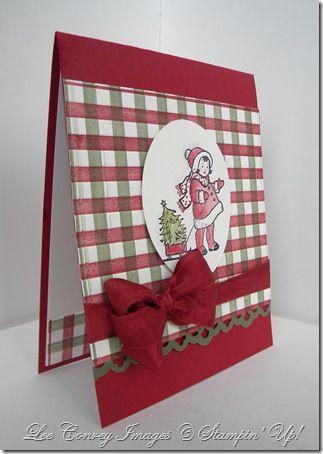
It’s time to get stamping again. Here is a cute card I did with the “Greeting Card Kids” Set from Stampin’ Up!
            Kids visit and checkered background 109

I love Cherry Cobbler and Always Artichoke on Very Vanilla….kind of gives this card a Nostalgic look…don’t you think?

Here is a little Tutorial for you! I hope you enjoy it.

Checkered Background Technique

This is a fun and easy Technique that you can do with the Stripes Embossing Folder. I hope you will give it a try…it’s easy…fun….and oh so cute!!!

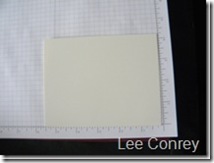
First you need to take a piece of Card stock cut to 4 1/4 x 5 1/2
                         clip_image002

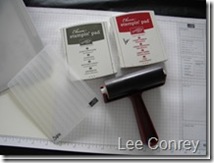
Next collect two of your colored pads that you will use,  a brayer, the Stripped Embossing Folder #123128 and your Big Shot.
                        clip_image003

Load your Brayer #102395 with one of the colors of ink and brayer onto the inside top portion (lettering on top) of your Embossing Folder. Then lay your cut piece of card stock in and crank it through your Big Shot. This is what you will end up with.

clip_image004clip_image005

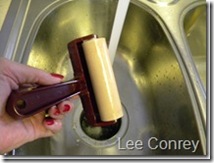
Next rinse your Embossing Folder and your Brayer under water to clean and get ready for your next color. Make sure to wipe dry with Paper Towels.

clip_image006clip_image007

Brayer on the Second Color onto the cleaned Stripped Embossing Folder.

clip_image008 clip_image009

Lay your stripped piece across the stripes this time and run through the Big Shot again……see what you get???

clip_image010 clip_image011

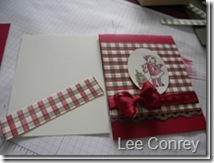
Here are the elements I’ve used for my card…..Greeting Card Kids Stamp Set (w) #119887-$20.95 (c) #120633- $15.95. Cherry Cobbler Seam Binding #120992-$6.95.  Cherry Cobbler Card Stock #119685-$6.95 cut to 4 1/4 x 5 1/2 and then I trimmed the piece of checkered to 3 7/8 x 4 1/4. I used the Lace Ribbon Border Punch #122362-$19.95 to add a little border at the bottom just to introduce a bit of Always Artichoke #105119-#6.95 into the mix. I stamped the image with Black Stazon #101406-$7.95 and colored with my Aqua Painter #103954- $16.95 and Rich Regals Watercolor Crayons #119803-$16.95.

clip_image012clip_image013

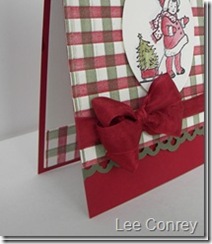
I tucked the Triple Bow behind the checkered piece and secured with adhesive, and attached all to the front of the card base. I did pop up the oval image piece with Dimensionals. I had a little piece left over so included it at the bottom inside to finish it off.  
                              clip_image014

Oh and I didn’t use the button….just didn’t think it needed it. Hope you enjoyed this fun and easy tutorial and will give it a try.

The Triple Bow was made using my Magic Bow Maker that my husband makes and sells. You can click here if you would like to order one.

I hope you enjoy the tutorial…

To order any of the supplies used….please visit my website at http://www.stampingleeyours.stampinup.net

Thanks Bunches and Enjoy!

post signature

Friday, September 16, 2011

Stamping 411 Sketch 221

Hi Everyone,

It’s time for another Sketch Challenge from stamping 411. I hope you will take a bit of time and join in the fun. We’d love to see what you come up with.

Here is this weeks sketch 221

ssc221 

…and my interpretation.

skethces 221-222 001

This week I’m showcasing the Gently Falling Tow Step Stampin’ Set from Stampin’ Up!.

It’ really fun and so easy to use. I did the Baby Wipe Technique on this one to get some different shades that matched the gorgeous Spice Cake Designer Series Paper that goes along so well with it.

My Card Base is Early Espresso cut to 5 1/2 x 8 1/2. The next layer is More Mustard (who knew it could be so pretty) cut to 4 x 5 1/4. Then a Vanilla Image piece cut to 3 7/8 x 5 1/8 and stamped randomly with different leaf outline images in Early Espresso. I then took a baby wipe and added some drops of re-inkers in Soft Suede, More Mustard and Pool Party. Then stamped the 2 step fill in part of the stamps onto the baby wipe to pick up the inside color of the leaves and stamped.

I then cut a piece of the DSP to 1 1/4 x 12 and pleated every 1/2 inch on my new Simply Scored and pleated my DSP and taped on. Final touches are a double bow done with my lace ribbon and one of the new HUGE Buttons for a striking touch. The Designer Buttons match this DSP perfectly and come in Spice Cake.  I chose to use the mustard one to make it pop! Did you know that the 1 1/4 circle punch fits exactly into the center of the button? It makes a nice landing place for a cute little image. I attached that with glue dots to secure.

Thanks for stopping in….hope you enjoyed my share and look forward to seeing you next time.

post signature

Thursday, September 15, 2011

Ribbon Share of the Week~Scallops Dot Ribbon

Hi Everyone,

As promised I am offering a Ribbon Share of the Week and this time it’s the lovely Scallop Dots Ribbon.

                                Polka Dot Ribbon

Want to try a lot for a little? then this Ribbon share is for you! I will have to have Five (5) people per share before I can order but with all of you asking that won’t take long to get to.

Each person in the share will get Two (2) Yards of each of these colors mailed directly to you. Well that’s once I cut and assemble your packages.

Basic Black, Cherry Cobbler, Chocolate Chip, Elegant Eggplant, Melon Mambo, More Mustard, Old Olive, Pretty in Pink and Tangerine Tango. So you will receive 20 yards of assorted Ribbon. How fun is that??? If you were to purchase all of these Ribbons on  your own it would be almost $95 !!

The share is $18.00 + $5.00 Priority Shipping. You will have to email me and put Dotted Ribbon Share in the subject line to take part. Please remember to add your Full name, Address, Phone so we can complete the transaction. When the shares are full I will send you a paypal invoice and order the Ribbon. If you would like to send a check that is fine too. Just let me know by contacting me for my address. Just hit the contact me button  at the top of my blog.

Looking forward to hearing from you and don’t delay as soon as I get a share full I will get them ordered.

Thanks for stopping by!

post signature