Showing posts with label Technique. Show all posts

Wednesday, April 19, 2017

Touches of Texture in Sepia

Hi Everyone,
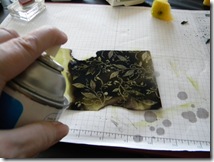
I'd like to share a fun technique with you today. It's the "Faux Sepia Technique". It's so fun and easy...you'll love it or at least I hope you will. lol


What a great technique using minimal supplies. Love when that happens and I don't have to pull out everything I own.
I'll be doing my Technique Class featuring this technique this month. I hope they enjoy it. 

Say, how would you like to get a set up for this card and a copy of the Tutorial? 
Just let me know. 
Just place an order on my website and it's yours!
I will email the directions and send the cut kit snail mail right to your mailbox. 
Here are the supplies needed....

Don't forget that I'm having a Blog Hop this Saturday for Autism Awareness. You won't want to miss it. So mark your calendar and check it out. 

That's it for today. 
Have a glorious day and do something fun....like stamping! lol


Product List

post signature

Thursday, November 17, 2011

Colored Soot Stamping Tutorial

Hi Everyone,
Good to be back again for a little bit anyway. Seems forever since I posted. Today I’ve got a card I made using the “Colored Soot Stamping Technique” Hope you enjoy it!                                  
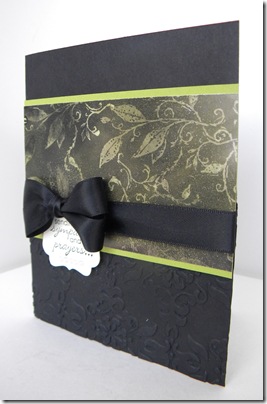
                                      colored soot stamping 016 
…and here is how you do it.
1. Select the colors of ink you would like…I thought I would use two colors but ending up using one. Stamps you would like to use and some Mat Finish Clear Acrylic Sealer. I like to use a taper candle for this technique too.  You’ll need some sponges and white glossy paper and something to light your candle with. .colored soot stamping 001
2. using your sponge sponge all over your piece of Glossy Card Stock. I always use a larger piece as you never know how much of it you will have left once you do this! hehehe
colored soot stamping 002 colored soot stamping 003
3. Light your candle and holding at an angle touch the flame to the colored side (shiny side) of the Glossy Card Stock. Keep it moving once you see soot starting to appear.
colored soot stamping 004 colored soot stamping 005
3. Continue on until the sheet is almost all sooted up! Now here is what I’m talking about….It caught fire twice on me….you though I was kidding about making your cut bigger than needed, to start, didn't you? NOT!! Holy Moly or should i say Great Balls of Fire!!! Make sure to blow out any little fires you may start.
colored soot stamping 006 colored soot stamping 007
4. My sooted cardstock, minus a bit! Not take your stamp of Choice and dry stamp onto the piece removing the soot. Make sure to clean stamp in between stamping so it’s doesn’t build up and you get a clear image. Do not touch the area as you will get soot all over you. See the flame? Don’t do that!!! hehe
colored soot stamping 008 colored soot stamping 009 colored soot stamping 010 colored soot stamping 011
5. Once you’ve cleaned your stamp and finished your piece spray it with the Clear Acrylic Sealer and let dry for a few minutes and cut to desired size.
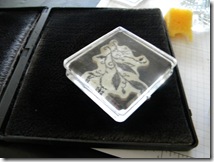
colored soot stamping 012 colored soot stamping 013 6. Sometimes you have to settle for less! As you can see I had two fires so had to make my card in the other direction. It’s all good. Just trim and design something lovely with your Soot Stamped Piece.
                                       colored soot stamping 014
…and here is what I made with my Sooted piece. Hope you’ll give this fun technique try!!
      colored soot stamping 015colored soot stamping 017

post signature

Saturday, January 10, 2009

Sweet Sampler Faux Stained Glass


Good Morning Everyone!
I'd like to share this card I made featuring the Sweet Sampler Set by Stampin' Up!
I decided that I could use the Stained Glass technique with this set or at least this image.
The image is stamped in Versamark on White Card stock Vellum and embossed with white Embossing Powder. Flip it over and color in the spaces with markers. I then matted it onto white Card stock and matted onto Regal Rose and old Olive. I scored lies going Vertically on the left side of the card, but I'm not sure it photographed well. I added some 5/8" Grosgrain and a rhinestone brad and there you go. It's very pretty in person and probably something I'll do at a Technique Class.
I'm at Regional Seminar today with some of my downline and having a great time. I'll be back tomorrow with some great things to share.
Don't forget about out big Blowout Bash Sale on our Accessories, you may want to order on line to insure getting those little things you need. You can order online at: www.stampingleeyours.stampinup.net
Have a Stampinglee Good Day!
Lee

post signature